Who is Interfax?
Delivers secure, cloud-based messaging solutions, including enterprise cloud fax and secure document distribution, to meet rigorous industry compliance standards. Enables a smooth migration from on-premises fax to a secure, auditable cloud fax and distribution solution.
Key business value:
Enables businesses to communicate easily and more cost-effectively through use-case specific, secure document distribution and enterprise cloud fax capabilities that are fully compliant with Health Insurance Portability and Accountability Act (HIPAA), Payment Card Industry Security Standards (PCI), and International Organization for Standardization (ISO) 27001. Offers a wide range of API’s for developers to integrate cloud fax into software applications such as order processing, travel management, and other workflow-intensive systems.
Worldwide fax number https://www.interfax.net
How to setup?
#1. on Interfax's side
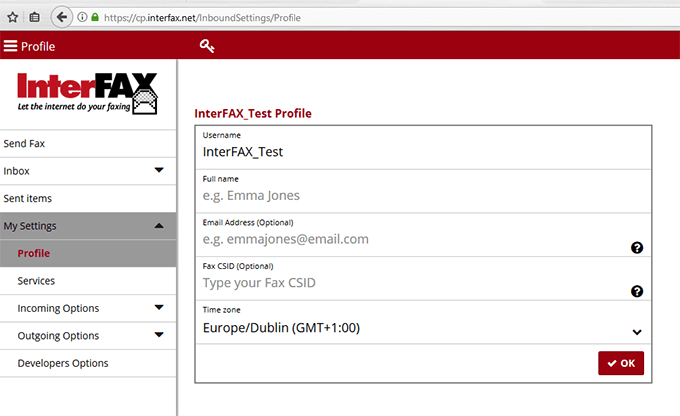
- Connect to your Interfax control panel.
- On left of the screen click in the section 'My settings', section 'Profile', here you can read the email which will receive your fax
#2. on Automatic Email Manager's side
- If Automatic Email Manager is not installed on your PC, just download and install it »
- Click on 'Accounts', then 'Add account'
- Enter the email address which will receive your Interfax faxes and follow the instruction on screen
- When account is set, you just need to add the action Print Attachment(s)
- Additionally you can add condition to avoid spam (see below in the tips section)
3 Best tips to improve your experience with digital faxes
#1. Print only faxes, avoid the spam
It is easy to filter received emails with the condition, you can specify the rule with
sender email contains from @fax.tc.
Below a simple example on how to set your condition (Read more on possible conditions »):

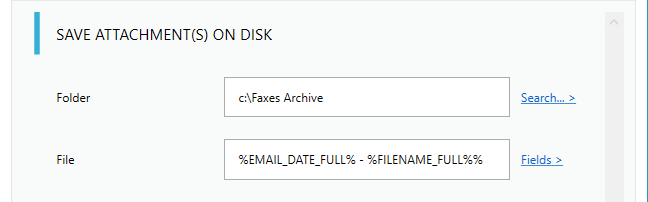
#2. Save a copy of your faxes for archiving
For archiving and backup purposes you often need to have your faxes saved on disk, it is easy with Automatic Email Manager, just after the print action you add a 'save attachment' action, specifiy the disk location,and that's it.
Read how to save the file on disk »
#3. Send a fax to reply an email or a fax
Sending a fax is straightforward: simply enter a fax number as the destination address in your email and add the fax document as attachment (PDF, XML, HTML, all file types here »).
Note: When registering to Interfax email-to-fax service, you can define which email addresses will be allowed to send fax, make sure to use the same in the field 'FROM'.
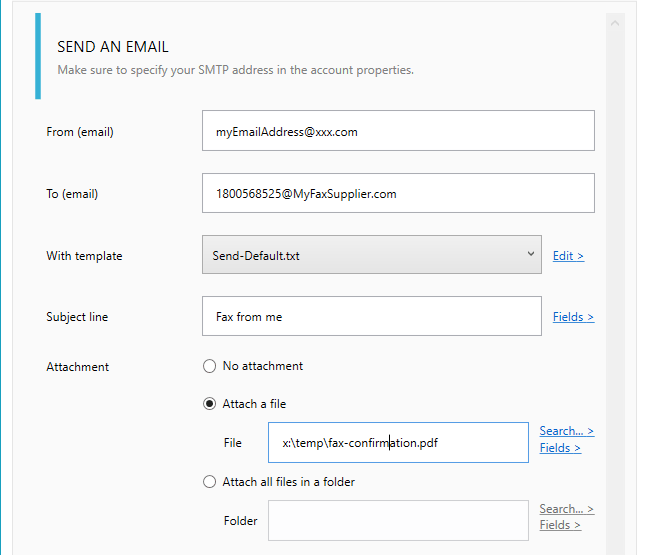
Here how to reply a fax in Automatic Email Manager:
- Add an action to reply email
- In the field 'From' make sure to use the email address on which you receive your faxes
- In the ‘To:’ field of your email simply enter the correctly formatted fax number followed by the extension ‘@fax.tc’.
- Set the fax file attachment
now each time a fax will be received, it will send a reply to the number you specified.
You can contact us for more information on this setting »
.